Skip to content

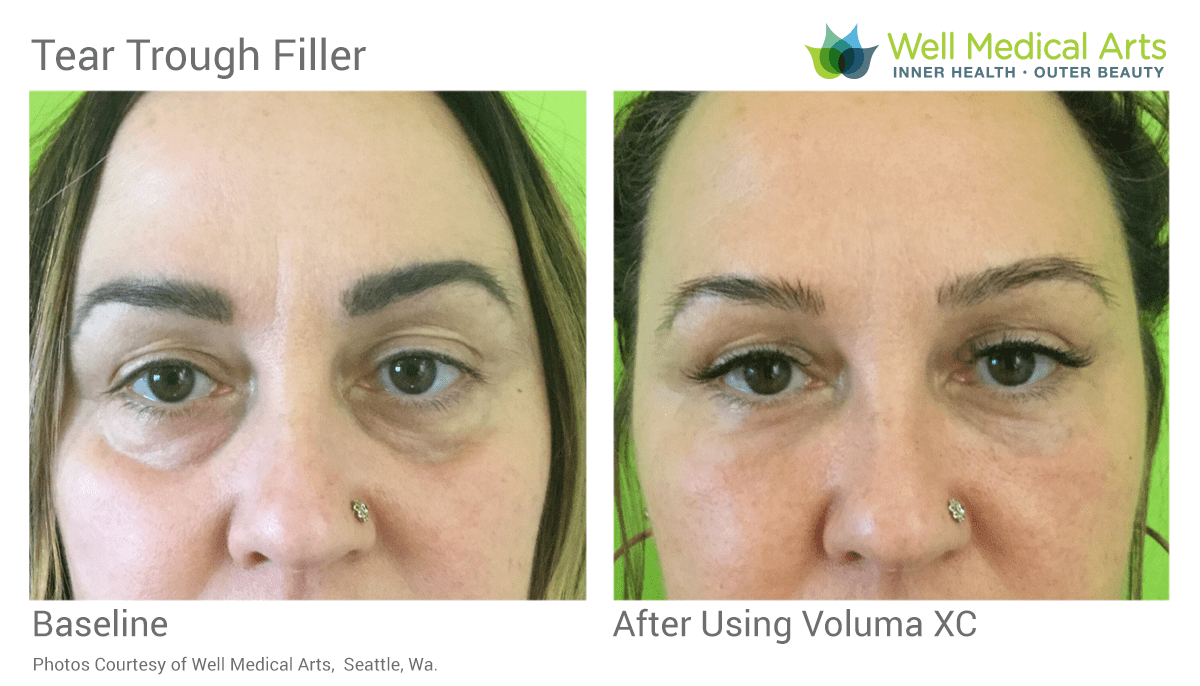
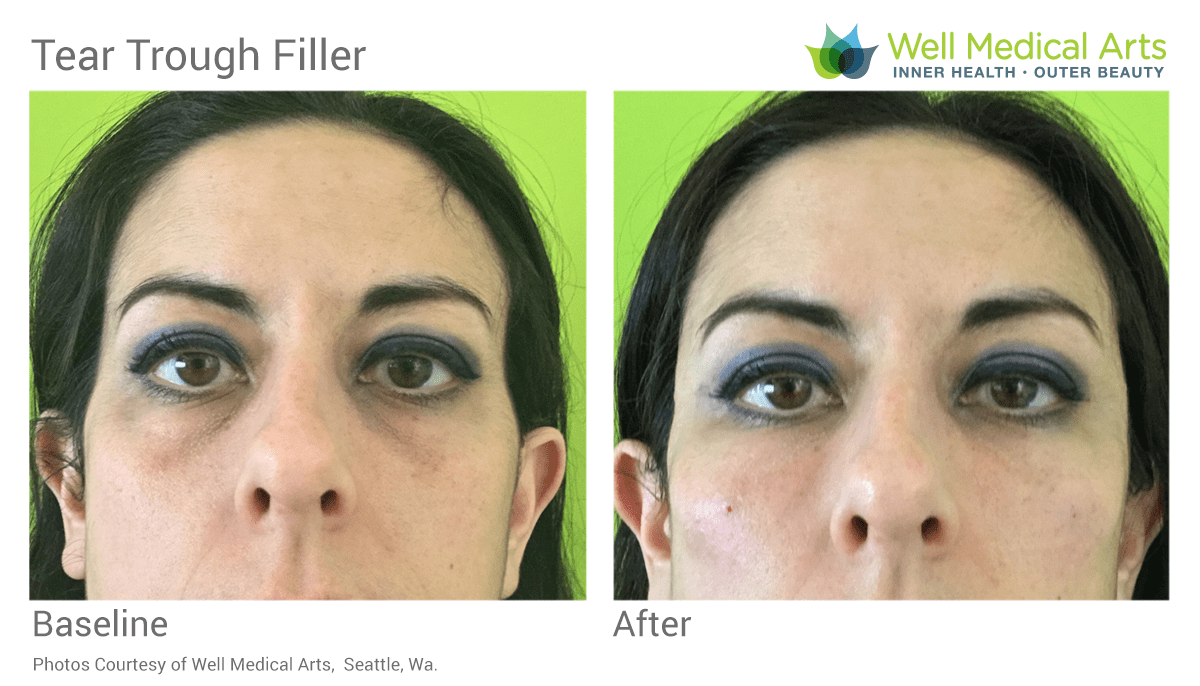
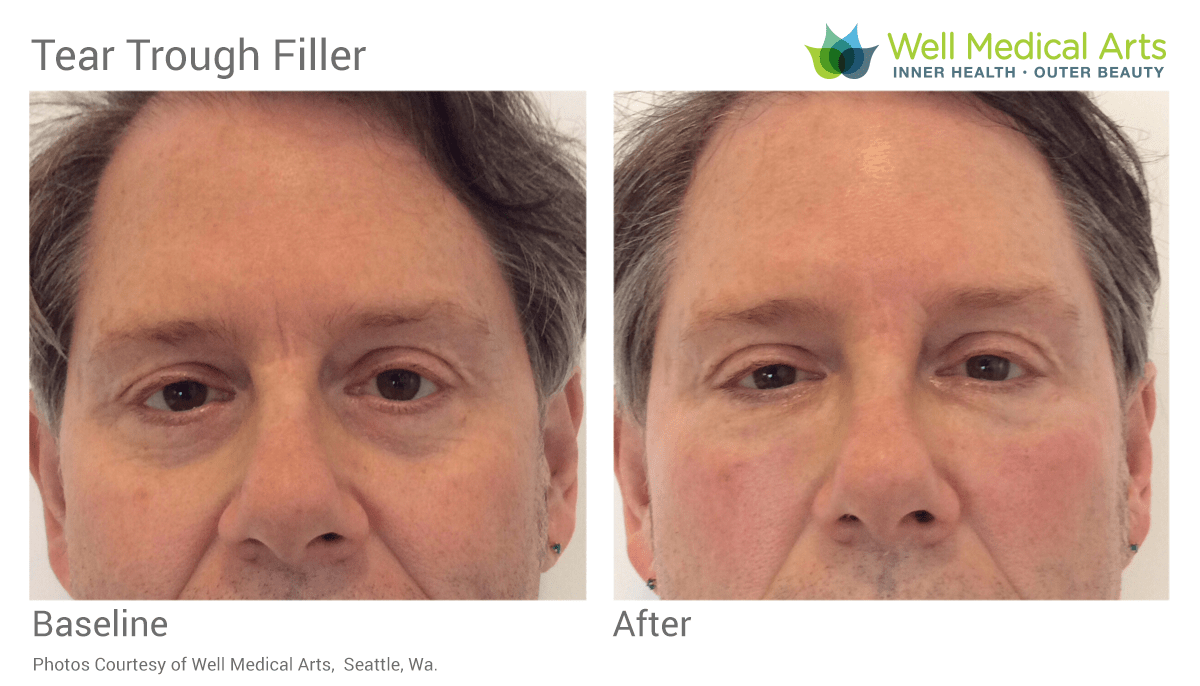
Tired of looking tired? Replacing lost volume in the Tear Troughs can reduce the appearance of black bags under the eyes, making you look younger and more rested.

For many patients, both young and old, filler treatments to the under eye area are a safe and effective alternative to surgery to minimize the tired look that dark circles under the eyes can cause. Many patients are unhappy with the shadows and depressions that occur under the eye, this can be due to genetics, but is also a common sign of aging. At Well Medical Art we have performed thousands of tear trough treatments over the last 15 years. 

Tear Trough with Restylane & PRP Before and After
Under eye filler before and after at Well Medical Arts in Seattle
Tear trough filler before and after in Seattle at Well Medical Arts. Learn more about tear trough filler at Tear Trough Treatment (Black Bags under eyes)

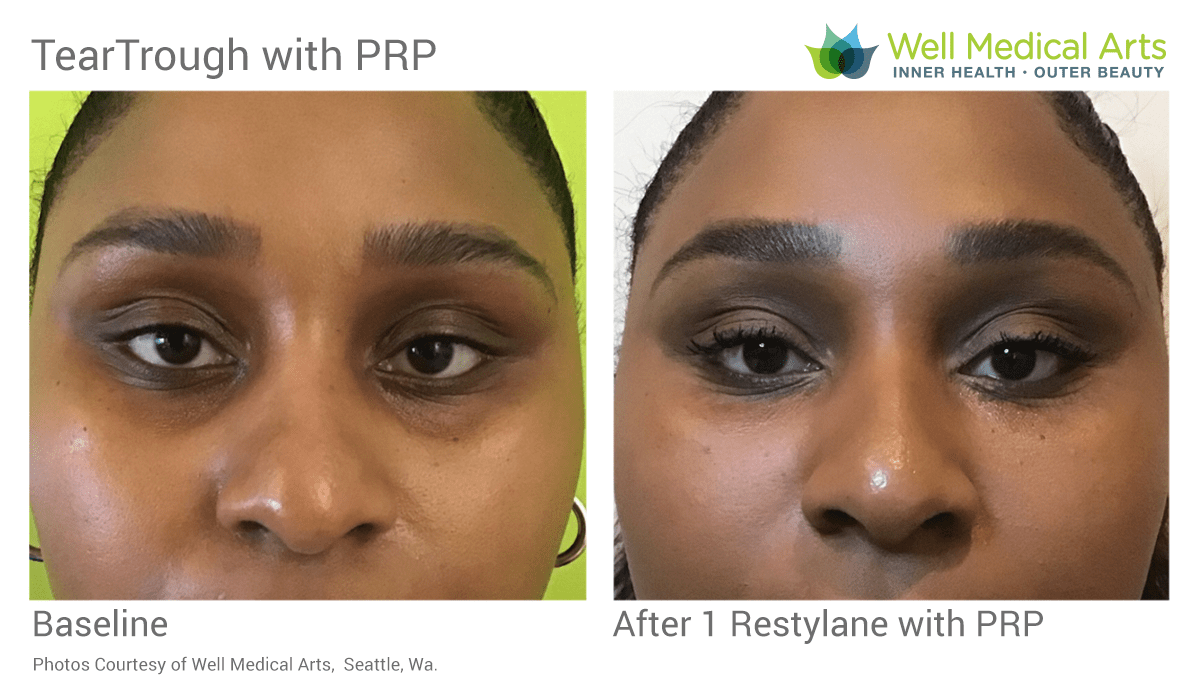
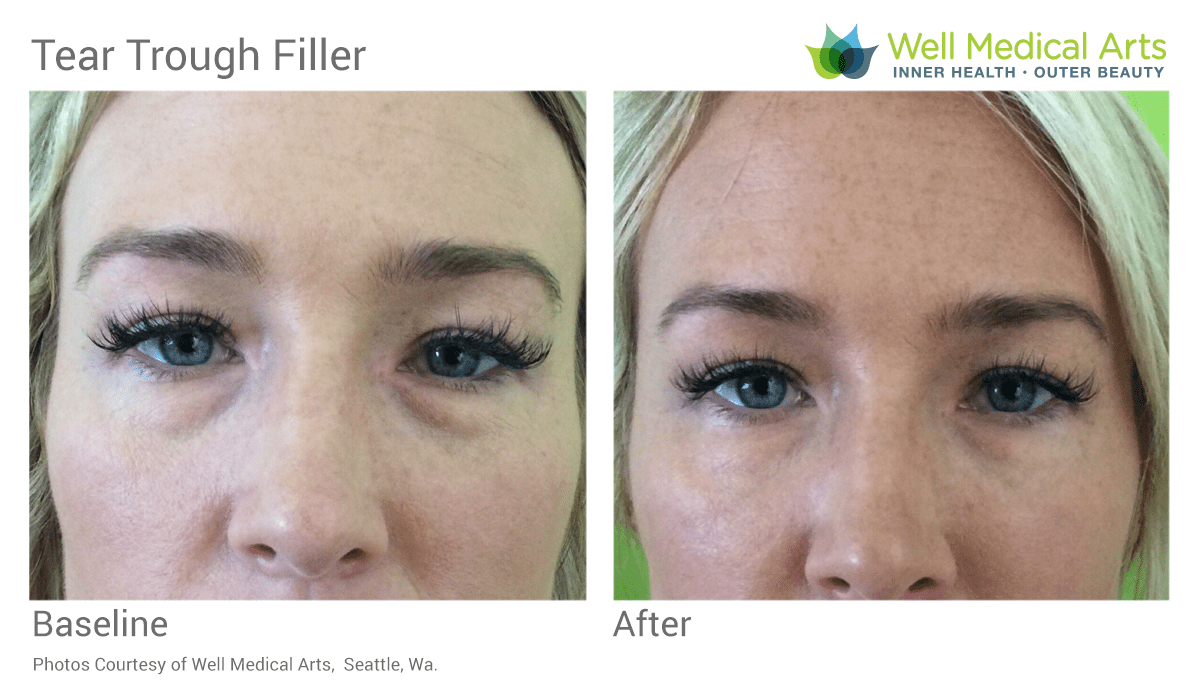
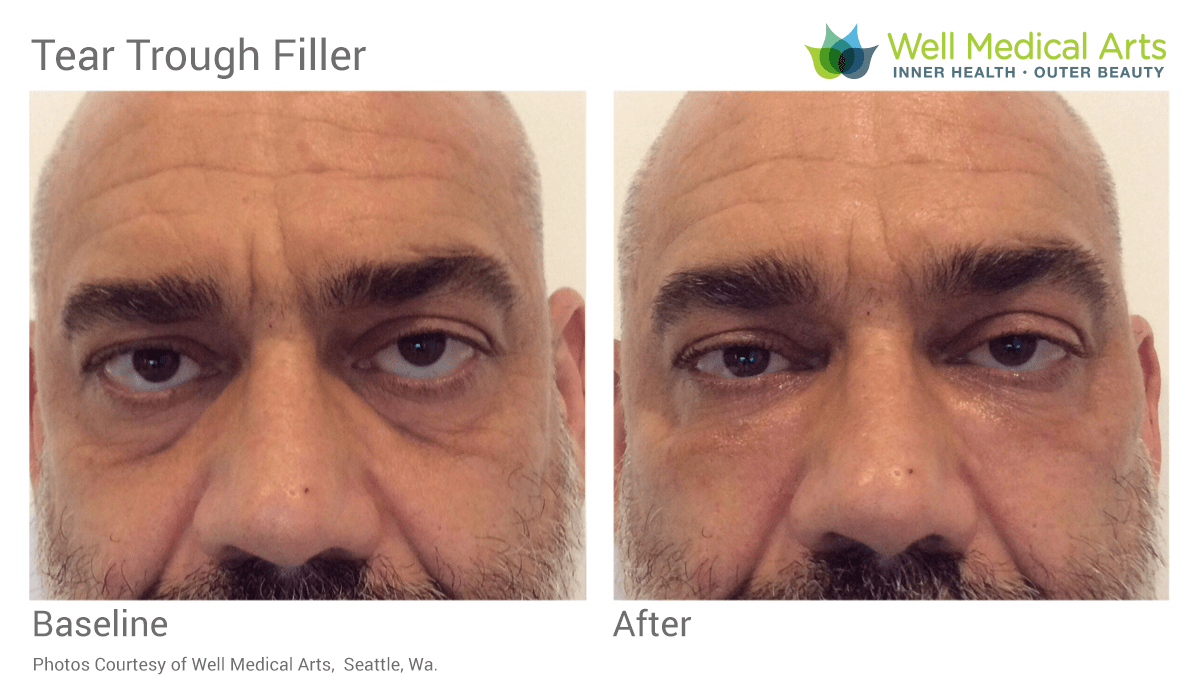
* Individual Results and Patient Experience May Vary

Tear trough filler before and after in Seattle at Well Medical Arts. Learn more about tear trough filler at Tear Trough Treatment (Black Bags under eyes)
Tear trough filler before and after in Seattle at Well Medical Arts
Tear trough filler for black bags under eyes before and after - 2 restylane at Well Medical Arts in Seattle

Schedule your appointments with potential downtime in mind.

No one likes to bruise or swell, but with any injectable procedure you must take these risks in mind when scheduling. At Well Medical Arts we take many precautions to minimize these side effects but will never be able to eliminate the possibilities.  DO NOT SCHEDULE A FILLER APPOINTMENT LESS THAN 2 WEEKS PRIOR TO ANY MAJOR EVENT. Keep in mind that everyone resolves bruises and swelling differently.  As a rule of thumb expect a bruise to last 5-10 days and swelling a little longer.

If you have experienced swelling it is advised that you give your body at least 2 weeks to heal before scheduling a follow up appointment. This gives the swelling time to resolve so that the dermal filler work may be accurately evaluated.

Tear Trough Illustration of how black bags under the eyes are created.

The tear trough and dark circles under the eyes.

The tear trough, also known as a nasojugal groove, extends from the inner corner of the eye, following a semicircular arc and transitioning to the palpebromalar groove. A deep tear trough can create a shadow that is perceived as a dark circle below the eye. It also creates a division between the lower eyelid and cheek that is an early sign of aging around the eyes. Patients with deep tear troughs often complain that they look more tired and older than they really are.

A tear trough is caused by tethering of the lower eyelid skin to the underlying facial bones. As aging leads to volume loss and tissue laxity in the lower eyelid, the tear trough becomes more prominent. The appearance of lower eyelid bags can accentuate a tear trough, making the shadow more visible. And while it is more common as patients age, even younger patients can have a tear trough deformity.

While a tear trough deformity can be corrected surgically by repositioning fat in the lower eyelid, treatment with dermal fillers have become a popular alternative. Many patients prefer a non-invasive approach, in order to avoid the risks and potential complications of surgery. Tear trough treatments with a dermal filler such can provide a patient with a natural result, with minimal downtime. The length in which a treatment will last will depend upon the dermal filler used.

Dominique demonstrates another example of a combination Tear Trough and Cheek treatment. Filling the tear trough helps to make people look healthy and well rested and minimizes black bags under the eyes. Replacing volume loss in the cheeks helps to lift the lower face and also helps with the tear troughs making it require less filler in the actual teat trough which is one of the most delicate areas of the face.

Online scheduling is not available for this appointment. Please call our patient care coordinators at 206-935-5689 to schedule your appointment or to learn more about this procedure.

The importance of experience in tear trough filler injections.

Dominique is one of the most experienced injectors in the Seattle Area and tear trough filler treatments make up a large part of her fillers practice. Filler treatments of the tear trough require a significant amount of skill and judgment. With poor judgment and unskilled technique, the complication rate is high and patient satisfaction is low. This is why many clinics will not perform tear trough treatments. It is essential for patients to undergo treatment not only with an experienced injector, but also a practitioner skilled in tear trough treatments. Over the years Dominique has perfected her technique using a micro cannula and PRP which enable her to treat multiple areas with only a single injection site. Using the micro cannula makes it easier on the patient and reduces the risks of bruising, using the PRP gives a smooth natural result and speeds up the healing process.

Who is a candidate for Tear Trough Filler treatment?

Patients who are good candidates often complain of a ‘hollow look’ or dark circles under they eyes; they may also point out enlarging fat pockets in the lower eyelids. Selecting appropriate patients for tear trough treatment requires expert judgment. Excellent candidates have good skin elasticity and adequate skin thickness. The position of the orbital rim to the tear trough is also an extremely important consideration. For these reasons, not everyone is a good candidate for treatment of the tear trough. However, Dominique Well has found innovative ways to sometimes treat patients who are not ideal candidates. This sometimes involves staged treatments as well.

Important points to know prior to your tear trough procedure.

  • Surprisingly, injections under the eyes are not painful. Patients are often anxious about their upcoming treatment, but are pleasantly surprised to find that there is very little discomfort.
  • Bruising is not uncommon after filler treatment of the tear trough, but typically resolves within a week. Swelling can be even more common and often takes a few weeks to resolve. Please read our post injectable instructions page if you have experienced bruising or swelling. Patients are advised not to undergo treatment if they have an important event around the corner.
  • Most patients are pleased with the outcome of treatment, even if their results are subtle.
  • Most patients only require 1-2 syringes of the chosen filler, but patients with very deep tear troughs may ultimately need multiple syringes.
  • As with all filler treatments, it is essential that patients avoid aspirin, ibuprofen, or any other medication/supplement that may promote bleeding. You can read our full list of Before and after care for dermal fillers at https://wellmedicalarts.com/post-injectable-instructions/

Online scheduling is not available for this appointment. Please call our patient care coordinators at 206-935-5689 to schedule your appointment or to learn more about this procedure.

VIDEO TRANSCRIPT

hey it’s dominique well from well
00:02
medical arts and today we get to show
00:03
you a combination therapy
00:05
of doing tear troughs and cheeks
00:07
together
00:08
frequently we’ll start with the cheeks
00:10
first which she has had and
00:12
loved them and then this time we’re
00:14
going to go ahead and add the tear
00:16
troughs
00:17
as you all know tear troughs is delicate
00:19
tissue it can swell it can bruise so as
00:22
long as we’re prepared for that we’re in
00:24
good shape
00:25
we go in and we use arnica to set
00:28
ourselves up for good healing
00:29
we use lidocaine for pain management a
00:32
cannula to try to decrease
00:33
swelling and bruising we do everything
00:35
we can to set people up for good healing
00:38
and now i’ll show you some good
00:39
technique to go with it so we’ve already
00:41
gone in
00:42
and done the arnica done the lidocaine
00:46
go ahead and close your eyes for me i’m
00:47
gonna test to make sure that you’re
00:49
feeling
00:50
numb a little tiny one two book tiny
00:53
folk
00:53
can you feel that poke great so i’m
00:56
gonna go
00:56
in and make a little port
01:01
we are using voluma today
01:05
voluma is a wonderful choice for the
01:07
tear trough
01:08
because it is not very hydrophilic
01:12
there you go when we’re doing the tear
01:15
trough
01:18
you want to go nice and deep so you
01:20
don’t see any of the filler
01:21
you just want to see the correction
01:26
awesome
01:29
how you doing how’s it feeling good
01:32
there we go we’re already seeing a nice
01:34
correction
01:35
with the tear trough less is more
01:39
small amounts little teeny tiny threads
01:44
of it
01:46
right nice and safe on top of the bone
01:52
and i’m gonna go in and feel it’s great
01:56
i can’t even feel it which is very much
01:58
what you want
02:01
you want it so nice and deep
02:14
looking good it’s very fun when you can
02:16
see that correction
02:18
right before our eyes
02:24
one of the things that’s so nice about
02:25
doing the tear trough is
02:27
even on men nobody looks like they’ve
02:30
had anything done
02:32
it just makes people look healthy like
02:35
they got a good night’s sleep
02:42
looks good feels good now we’re going to
02:43
be going in and getting the cheek
02:45
as well could do just a little bit more
02:51
and this is where you want to be so
02:52
careful is not to do
02:54
too much
03:00
great
03:03
so very small amount looks good
03:06
really nice and healthy i’m going to go
03:08
on over to the other side
03:10
oh yeah oh yeah and
03:14
now one of the things that i notice is
03:17
when you do this
03:18
as you sit forward there’s more volume
03:21
loss
03:22
yeah so when we’re leaning back it looks
03:24
nice and good right
03:25
and now when we’re moving forward it’s
03:27
like there it is yeah
03:29
now to me it looks like it could do more
03:30
again and so this is why it’s good to
03:33
stop
03:33
and take a look at it right yeah let’s
03:36
go in
03:37
and it’s starting to swell just a little
03:39
bit
03:40
let’s go in and do just that a little
03:42
bit more there
03:50
yeah wow pretty cool huh yeah
03:56
you can feel a little bit under there
03:58
but that’s fine it’s deep under there
04:00
yeah no it’s good
04:04
looks great yeah let’s go to the other
04:06
side
04:11
awesome okay and look at that not
04:14
bleeding at all which is a good sign
04:16
that we’re not going to
04:17
bruise good isn’t that nice yeah so
04:21
just this little bit and i did what it
04:23
was retracted from the nose yeah
04:26
and then i put quite a bit so there’s
04:29
just that little area that didn’t
04:31
correct but it is actually corrected
04:33
under there
04:33
okay and in general looks nice looks
04:36
healthy
04:37
okay and so now we’re gonna
04:40
start with the radius
04:45
that has more volume towards it here
04:49
and then actually use a little bit of
04:50
the volume towards the lateral where
04:52
it’s softer where you don’t want big
04:54
cheekbones to come out here
04:56
all right
04:59
so this is different this isn’t
05:03
uh using the lidocaine and the cannula
05:06
this is using the needle and
05:09
we want that because you know this
05:11
terminology
05:12
we want to bolus the radius which means
05:14
put it into a little ball
05:16
right on top of the bone so that it
05:18
gives us that beautiful
05:20
3d projection that that radius does we
05:22
want to really maximize the beauty of
05:24
the product
05:25
okay you good and cold yep
05:41
all right so we’ve gone in and we’ve
05:43
done the tear troughs with the voluma
05:45
nice and deep half a syringe on each
05:47
side
05:48
then we’ve gone in and we’ve done the
05:50
radius for the medial
05:52
cheek where we really needed the
05:53
thickest body of
05:55
the filler and now we’re going to go in
05:58
and use the voluma to
06:02
the lateral cheek and that was just what
06:04
she had purchased
06:06
and what we had to work with so always
06:07
finding the best
06:09
use for the product that we have
06:21
i just want to mention the people who
06:23
are watching
06:24
yes i absolutely adore doing cheats
06:28
because they do
06:29
do so much for so little and it’s so
06:31
easy to do
06:32
usually if there’s any swelling in the
06:34
cheeks it looks cute people don’t mind
06:36
it too much
06:37
but you don’t want to neglect
06:41
the temples and just keep putting it in
06:44
the cheek just because it happens to
06:48
look good
06:51
so it needs to balance putting the
06:54
filler
06:55
back into the areas where you lost the
06:58
volume in the first place
07:00
so it looks very natural too
07:03
and i like to say it just putting back
07:06
what you’ve lost
07:07
not giving you something that you’ve
07:08
never had
07:10
and then the last thing that i’d like to
07:13
mention perfect this looks gorgeous
07:16
is that if we don’t get enough
07:19
lift to the nasolabials or the
07:22
marionettes
07:23
after going in and volumizing the upper
07:26
face
07:27
and it just depends on what that upper
07:29
face is happen to be tear trough for you
07:32
on somewhere in its temple so after you
07:34
volumize let’s do a little arnica let’s
07:36
sculpt
07:37
and then let’s do a warm compress
07:40
if it’s not enough lift the thread
07:43
lifting
07:44
are wonderful techniques to lift
07:47
this mid and low face without using any
07:51
balloon
07:52
so we’re really moving away from too
07:55
much filler to the lower face you don’t
07:57
want that lower face to be heavy
08:00
you don’t want it to look like it’s
08:01
having anything done
08:03
all right the topicals are sculpting
08:07
it’s got a nice little glide to it so we
08:09
don’t tug on the skin
08:13
now this warm compress is something that
08:15
you can easily do at home and this
08:17
feels good this is where i’m trying to
08:19
redeem myself after pogba
08:22
and this should feel lovely
08:28
so at home you’ve got your oral arnica
08:32
to take every six hours
08:34
and then for swelling and particularly
08:37
in the teardrops
08:38
that’s where the warm compost is going
08:40
to be your friend
08:42
no most of us are a little bit more
08:43
swollen in the morning
08:45
after being horizontal all night go
08:47
ahead and look up towards the ceiling
08:49
i’m going to put the warm converse right
08:50
about here so when you wake up in the
08:52
morning
08:53
you can stick the washcloth in the
08:55
microwave for like 25-30 seconds
08:58
i’ll do two or three warm compresses
09:00
just standing there in front of the
09:01
microwave
09:02
or you can do it in the shower however
09:04
people like
09:05
and that really does take down the
09:08
swelling nicely
09:13
i think it’s a win take a peek
09:18
oh yeah i love it i love it thank you so
09:22
much you’re very nice so nice looks
09:24
super healthy
09:25
not overdone nobody’s gonna know you had
09:27
anything right
09:28
i like it i love you so much lastly i’d
09:32
like to
09:32
teach you how if you do get swelling one
09:35
of the things that the tear troughs can
09:37
do is swell
09:38
and even when the cheeks swell if it’s a
09:40
lot they will take the path of least
09:41
resistance
09:42
which is up into the tear troughs and
09:45
swirling in the tear trough does not
09:46
look
09:47
cute so after you do your warm compress
09:50
let me show you how to put a little bit
09:51
of this arnica on and i’m going to have
09:53
you turn this way so people can see
09:56
you can use whichever finger you like i
09:58
like to use the middle one
09:59
i’m putting a fair amount of pressure on
10:01
there and then i’m moving the fluids
10:04
over towards the lymph nodes and then
10:08
down so your lymphatic chain is all in
10:11
the hairline
10:12
in front of the air and down the side of
10:14
the neck and what happens after i poke
10:16
you
10:16
your body sends down all the white blood
10:18
cells and everything to heal it
10:20
that’s what causes the inflammation and
10:22
after it’s done its job
10:23
we want to get it back into the
10:25
lymphatic back into the vascular system
10:27
so if we just do a little bit of this is
10:29
called lymphatic drainage
10:31
massage technique
10:34
there we go and you won’t be able to
10:38
move your filler that’s everybody’s
10:39
biggest question is do i have to sleep
10:41
upright nope
10:45
and am i going to be able to hurt my
10:46
filler nope nobody’s ever moved it
10:50
this is just going to move the fluids
10:52
out and it really works nicely
10:55
let me get the other side
10:58
so you can do that at home if you wake
11:00
up with a lot of swelling you don’t have
11:01
to it’s just another tool that we use
11:04
we actually have something called the
11:05
hydrafacial and
11:07
it has a vacuum on it that does
11:09
lymphatic drainage so people don’t want
11:11
to do it they can come in and have it
11:12
done okay
11:13
perfect all right like it thank you so
11:15
much you’re welcome
Back To Top